The Waniskâw Foundation: Building a Digital Art Tool Designed For Indigenous Youths in Canada
Role: Project Manager & User Researcher
Year: 2025
Project Goal
- Build an open-source digital vector art designed for Indigenous youths in varying communities across Canada.
- The intent is to remove technological and financial barrier that prevent youths from accessing the art tool.
- Long term goal for the client is being able to integrate the art tool to their current coding tool.
Process
Duration: 3 months
Tool used: Trello, Gantt chart, Excel spreadsheet,
Tech stack: Paper.js, react
Design: Figma
Methodology: Agile and Kanban
Documentation: Google Drive (Docs, Sheet), Sharepoint, Canva
Impact
Built a functional prototype of an art tool that the client can test in his upcoming education workshops with the Indigenous youths in Fall 2025.
The functional prototype of the art tool allows users to do the following functionality:
- creating shapes (triangle, square, rectangle, polygon) using shape tool
- creating lines
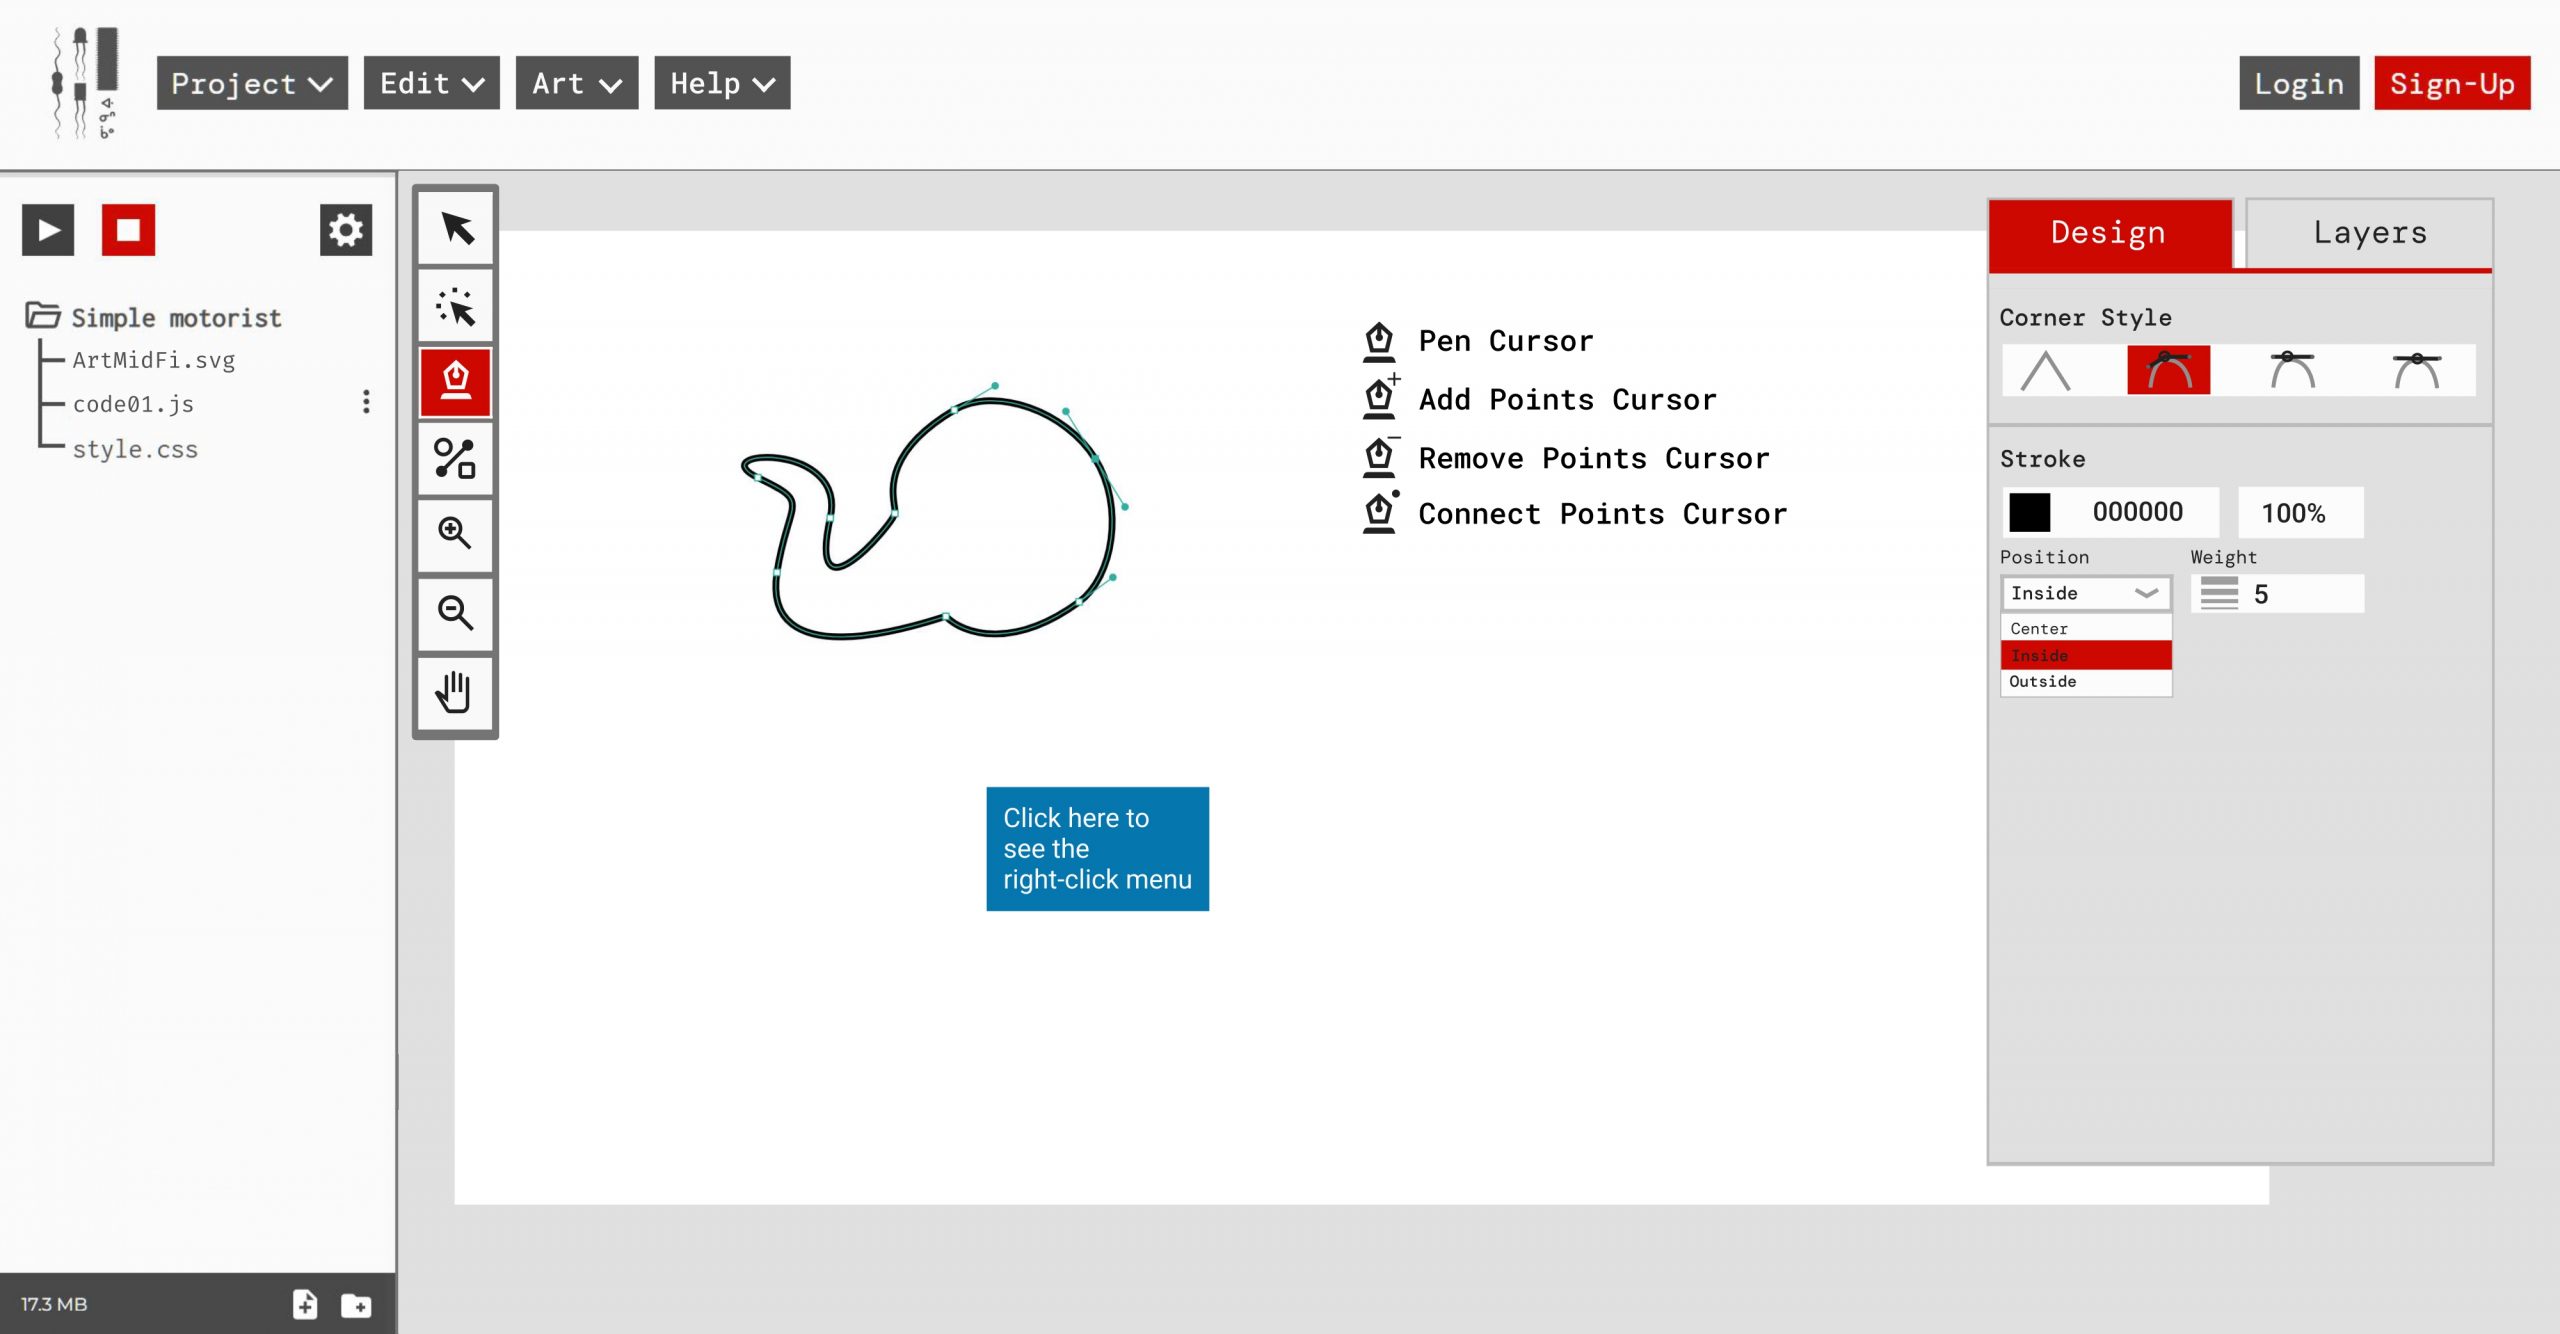
- creating organic shapes using pen tool
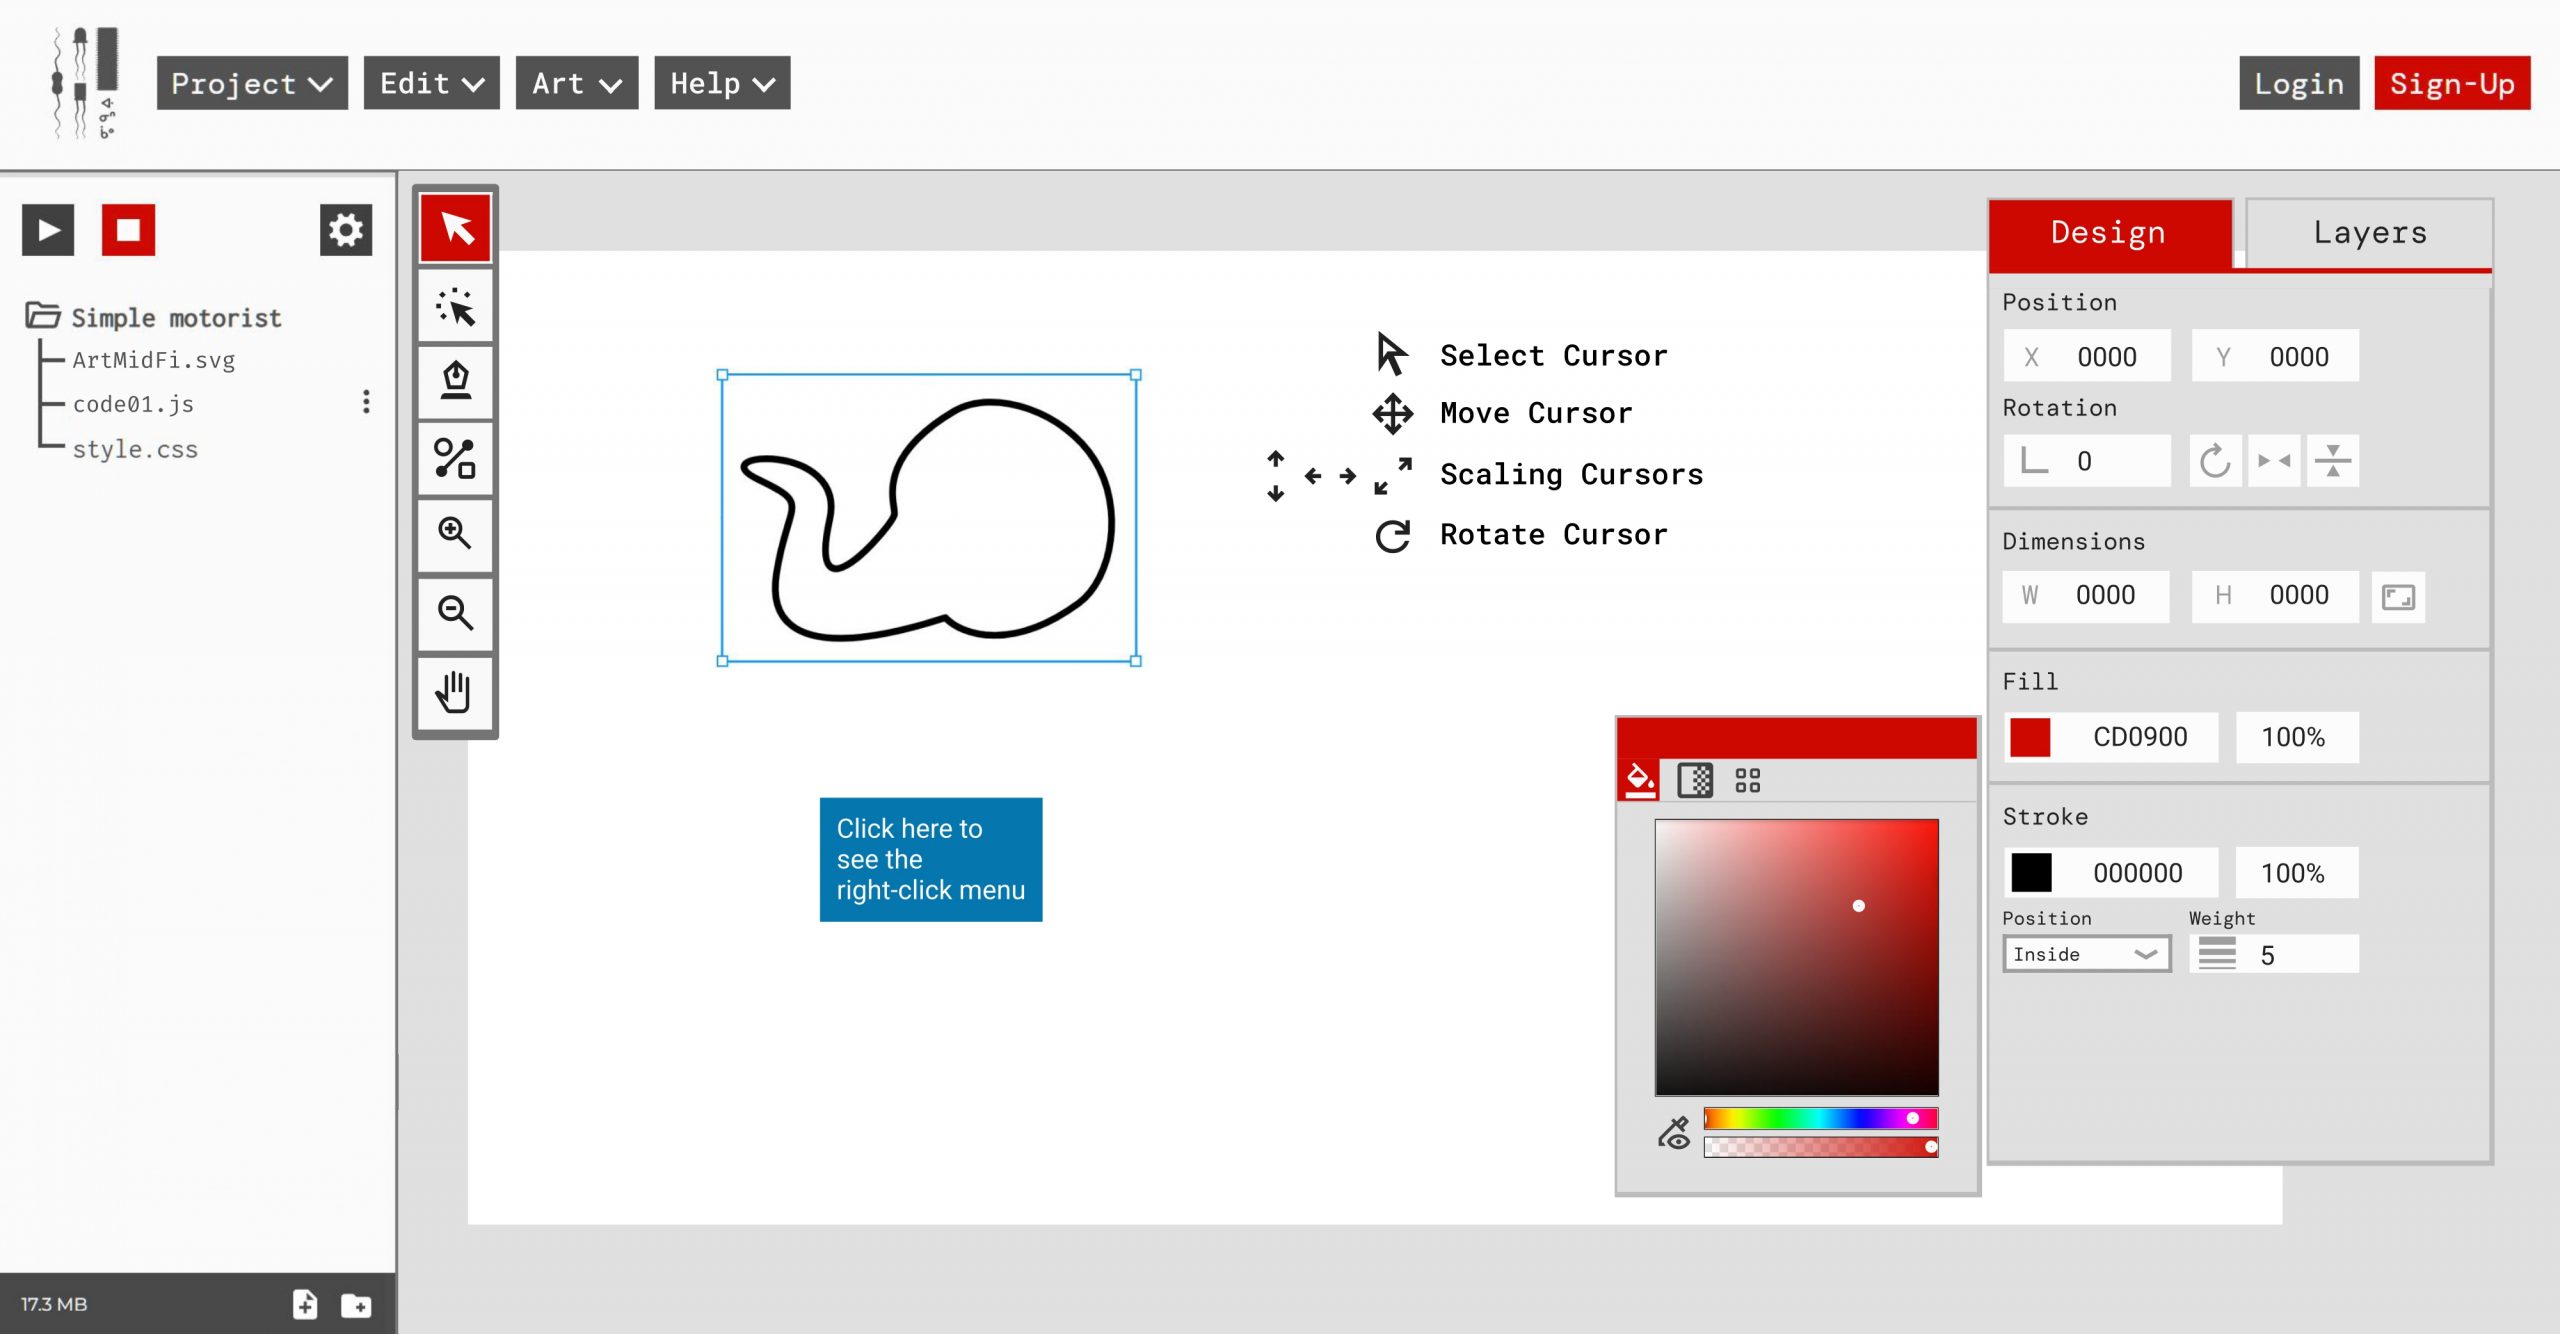
- selecting objects and points
- adjust colors of shapes and adjust line thickness
My Role
As the project manager for this digital art tool, I played a central role in coordinating and driving the project from conception to delivery. My key responsibilities include:
- Project Planning & Communication
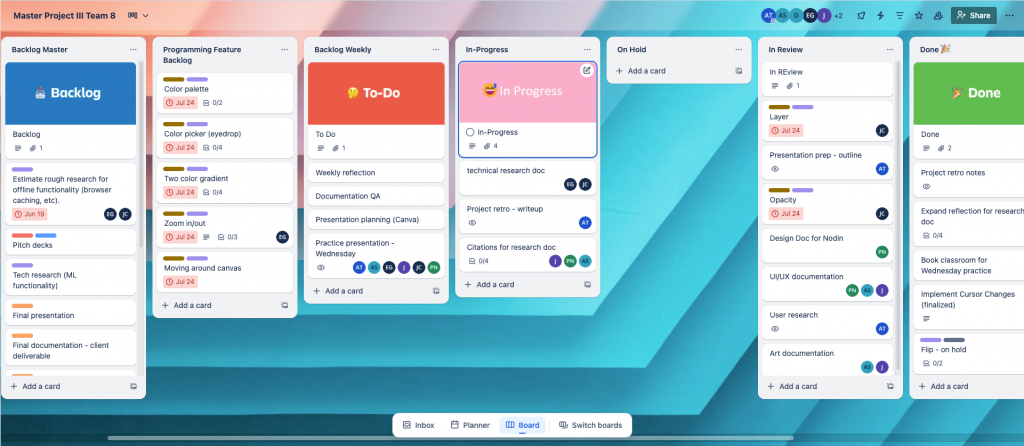
- Managed project progress and resolving tickets using Trello.
- Planned project timeline using Gantt chart and executed the project based on a critical path.
- Communicated with stakeholders (project team and client) to provide project status updates.
- Facilitating Sprints
- Used the Agile and Kanban methodologies to execute the project.
- Conducted weekly sprint planning for iterative design and did daily stand-ups to remove blockers.
- Research
- Conducted user interviews and survey to identify user pain points.
- Conducted user playtest to test the prototype and iterate using the Keep, Fix, Change method.
- Product Requirements
- Creating detailed product requirement documentation (PRD) to align between the client and project team.
- Resource allocation
- Allocate appropriate resources based on the team member’s skill levels and time commitment to deliver the workable prototype on time.
- Quality Assurance
- Overseeing quality assurance, including design reviews and ideation validations
Problem Statement: How might we design a digital art tool tailored to Indigenous youth that still adheres to industry standards for art software?
Research
User Research
The process of doing the user research was challenging because we didn’t have easy access to the demographics that our client is targeting. Although the team could have gone through the SFU (Simon Fraser University) ethics board to allow us to survey and interview youths, we decided not to go down that route because the time taken to get an approval is quite long. Considering the 12-week timeline of our project, it was not in our best interests to wait that long as it would have significantly delayed the project timeline. A “Plan B” that we went with instead was to interview local indigenous artists (including one group who conduct art workshops with indigenous youths) to understand the type of artwork they create (or want to create), the tools they use, and the kind of features they look for in the art tools they use. We also sent short questionnaire to collect feedback from artists about their preferences when using art software, to help identify features that artists commonly use with such tools. The goal was to use this feedback to inform what features the team would like to prioritize for development.
User interview questions:
- What backgrounds do the First Nations youth at these workshops come from What kind of media do they watch/listen to?
- What kind of media do they watch/listen? What creative inspirations are they brought up with?
- What kind of tech do they have access to (smartphones, laptops, etc)?
- What kind of art do they make do they make at the workshops)?
- What kind of themes do they like to draw when they’re left to their own devices?
- Are there any styles they tend to like/emulate with their own art?
- Do any of the youth continue to do art afterwards?
- Do the youth prefer to collaborate on creating an artwork or do they prefer to do it individually?
User survey questions:
- What kind of media do you watch or listen to?
- Where do you get inspiration for your art?
- What kind of art do you make? (2D, 3D, concept art, etc.)
- What device do you use to make art? (Tablet, computer, paper, etc.)
- What programs do you use the most? (Photoshop, Procreate, Blender, etc.)
- What tools or features do you use most inside those programs?
- Are there any features you’d like to change or add in your current tools?
Key themes:
- Indigenous artists/youths prefer to explore themes like stories from their Nations, Pokémon, original characters, and a fusion of Indigenous and street art styles.
- They also enjoy collaborative creation, and find value in their community and the ability to contribute their personal styles to shared projects.
- Procreate is a popular tool used among 2D artists and illustrators, especially the Line tool because it helps create custom lines and shapes that are used as motifs in a lot of indigenous art forms.
- Many Indigenous comic writers draw inspiration from manga rather than western comics, as the latter don’t have the same values and perspectives that Indigenous communities do.
Sprint Planning
Agile Methodology – I used the agile method throughout the entire project because it was more beneficial for the progress of the project for us to set goals (and plan tasks to help us achieve those goals) on a weekly basis. We had 12 sprints in total, each one week long. Since we had client meetings on Mondays, we treated Mondays as our sprint planning day for the week; the tasks assigned during that week had their deadline on the Thursday of the same week.
| Sprint | Deliverables | Sprint Goal |
| Inception and Ideation | ||
| 1 | 1. Brief discoveryInitial client meeting. 2. Setting up and onboarding project team. | 1. Determine the parameters, requirements, and feasibility of the project from both user and technical perspectives. 2. Determine the purpose of the digital art tool. 3. Figure out communication methods and schedules with the client. 4. Onboard visiting students and figure out the team schedule. |
| 2 | 1. Research starts for UI/UX, users, and programming 2. User interviews and user surveys 3. Research different Indigenous art styles 4. Research UI layouts inspired by the software aesthetics of the 80s and 90s | 1. Determine the feasibility for implementing the art tool. 2. Determine the most feasible coding framework. 3. Determine which art format (raster, vector, or pixel) the team will focus on implementing. 4. Understand what the users need and want to do with the digital art tool. |
| 3 | 1. More user interviews (because the ones we did weren’t comprehensive enough) 2. Design versions of the lofi wireframe of the UI layout 3. Crazy 8 exercise to brainstorm ideas for the digital art tool | 1. Get more data from user interviews to better help us with determining which features to prioritize. 2. Lo-fi wireframe options for the client to decide on at the next meeting. 3. Determine if there is a way to add something unique to the art tool, such as indigenous art shape presets. |
| 4 | 1. Mid-fi wireframe for UI layout 2. Bullseye exercise to finalize the features to pitch to the client | 1. Decide on the file type (i.e. vector) and get the client’s approval. 2. Finish the bullseye exercise so that the team can pitch our final decision in week 5. 3. Get the client to decide on a style for the UI layout. |
| Production – finalizing the Figma UI prototype and implementing functionality | ||
| 5 | 1. Pitch the team’s final prioritization and scope. | 1. Finalize the scope with the client so the team can move forward to production and programmers can start implementation. |
| 6 | 1. Draft project charter/agreement 2. Start development for selecting shapes, tool bar, shape fill. 3. Finalize UI layout | 1. Have the project charter ready for the client to review. 2. Allocate one week for this in the event of a back and forth regarding the terms and conditions of the project charter. 3. Get the UI layout approved by the client so the designer can hand it over to the developers, since it’s the biggest blocker. |
| 7 | 1. Team Process Retrospective 2. Implementation for critical features continued: line thickness, shapes (rectangle, triangle, circle), pen tool 3. Design documentation written to provide functionality direction for the programmers | 1. Resolve the communications blockers between developers and designers/project managers. 2. Continue with the project timeline so that the pen tool, shapes, tool bar, and selection tool are ready for User Playtest 2. |
| 8 | 1. Planned and prepared for User test. 2. Implementation continued for critical features. This included shapes (polygon), adjusting canvas size, and refining pen tools. | 1. Ensure that the features we’ve implemented so far are ready to be tested in User Playtest. |
| Production – User testing of features and continue to iterate | ||
| 9 | 1. User playtest was conducted to test the few features that were implemented so far. | 1. Gather enough and valuable user feedback to KFC. |
| 10 | 1. Bug fixing of issues discovered during the user play test. | 1. Continue with the final stages of production and the remaining features to be implemented 2. Begin documentation |
| 11 | 1. Implementation of layers. 2. Prepared client final deliverables, including documentations for Figma file, research, wireframe, design documentation. 3. Video trailer | 1. Get ready for the final hand off and final client meeting in week 12. |
| Delivery | ||
| 12 | 1. Bug fixing/polishing and documentation 2. Final meeting with the client 3. Final client hand-off 4. Project retrospective documentation | The client was happy with the final prototype that the team presented. |
Design Process
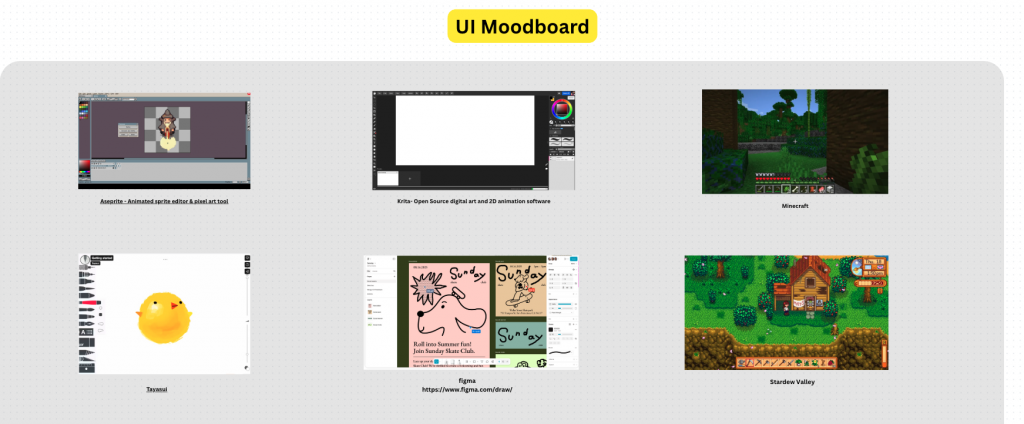
UI Moodboard

UI Layout Wireframe
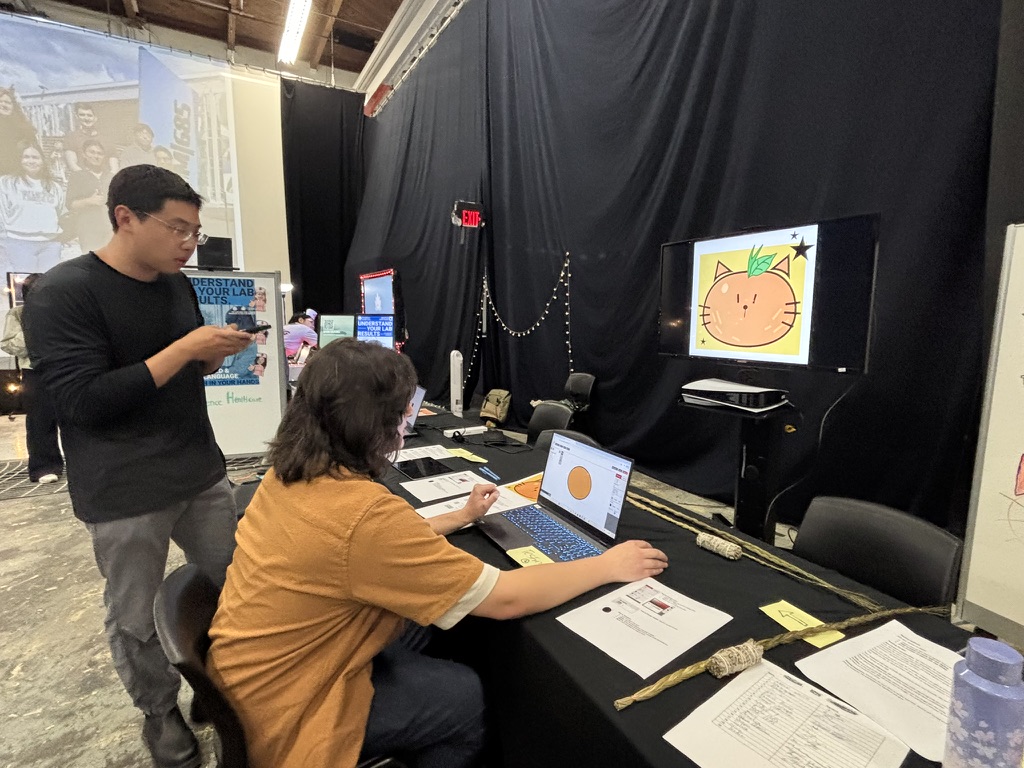
User Playtest and Result
I was also responsible for quality assurance of the product. For the user playtest, I wrote testing scripts for user playtest, onboarded the team with the testing instructions, conducting mock playtest with the team. I also analyzed and synthesized the user playtest data with to be sent over the client.
Test Goal
This test was focused on functionality and usability. As this was our first test of the art tool with multiple users from outside our team, the goal was to get outside perspectives from a diverse set of people (in terms of device familiarity as well as art experience). The tool we had ready for the test had the critical features along with some of the “more important” features implemented, but not polished.
Methodology
The playtest was a moderated playtest. We used a think-aloud method to let the users verbalize their thoughts while completing the tasks. The questions that we would like to answer are:
- Do users understand how to use the following basic vector art features in the tool?
- The Select tool
- The Direct Select tool
- The Pen tool
- The Shape tool
- Can users change the properties of the objects they are drawing (e.g. the size, color, outline, position, rotation, etc.)?
- Are there any features that users are missing from the art tool?
- Are there any consistent sources of frustration for the users within the art tool?
Test Plan
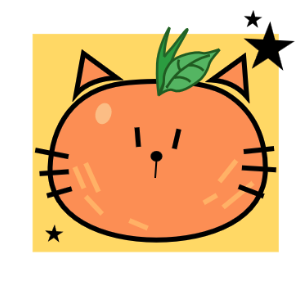
Users are briefed on the purpose of the art tool, they were then directed to either a laptop or an iPad with the tool at the ready (the iPad had an Apple Pen with it as well). They were then given a task to draw as much of the reference picture below as they could in five minutes, using the features in the art tool.
The users were informed that there was no right or wrong approach to drawing the above picture (they could use tools in any way they wished), and the only goal was to complete as many of the features in the image as they could within a limited time. Users were also encouraged to think out loud while they drew, so the testing team could make informed observations.
Test Result
We had 28 responses for the survey. In order to get more consistent data points from it, we sorted the data according to the device used (i.e. laptop or tablet) as well as the art experience level of the user (i.e. beginner, casual, expert at raster only, expert at vector only/and raster). This gave us eight categories that the users then fell into:
| Group | Device | User Skill Level | Number of users |
| A | Laptop | Expert at vector art | 7 |
| B | Laptop | Expert at raster art only | 3 |
| C | Laptop | Casual | 3 |
| D | Laptop | Beginner / not an artist | 5 |
| E | Tablet | Expert at vector art | 2 |
| F | Tablet | Expert at raster art only | 5 |
| G | Tablet | Casual | 3 |
| H | Tablet | Beginner / not an artist | 0 |
Key concerns:
- Pen Tool
- Many users tried to use the pen tool like a free-draw brush (not understanding it’s for creating vector points & curves).
- The direction of initial curves made with the pen was unintuitive (often opposite to expected).
- Users struggled to stop drawing, complete shapes, or with reselecting the pen tool to draw a new shape.
- This is tied to the issue with switching between tools mentioned further below.
- Color/Fill issues
- Many users had trouble finding or using the fill feature to change colors on shapes.
- Some users did get around the lack of a color picker by copying & pasting hex codes.
- The fill tool behaved unpredictably (e.g. the fill turning black when changing hue, resets on using sliders, and so on).
- The color tool was particularly frustrating on iPad because the interface for it was both smaller and partially cut off.
- Many users had trouble finding or using the fill feature to change colors on shapes.
- Selection issues
- Difficulty differentiating between Select vs Direct Select (selecting a whole shape vs selecting points on a shape).
- Many users struggled with moving, scaling, or rotating shapes, especially when the shapes were small.
- Users didn’t understand that they had to deselect current shapes before drawing new ones with the pen tool.
- Missing or hard-to-find features
- Many users tried to duplicate shapes (the feature was missing in the build that was tested).
- Users missed having layers, or otherwise found arranging shapes difficult.
- iPad version difficulties
- iPad users struggled with multiple issues, like:
- Small UI icons
- Cut-off panels
- Unreliable keyboard input (e.g. for stroke thickness)
- Lack of delete & undo options on iPad
- Apple Pen usage needs some time to onboard, because it changes the keyboard configuration and for people who are not familiar with the Apple Pen might experience some difficulties.
- iPad users struggled with multiple issues, like:
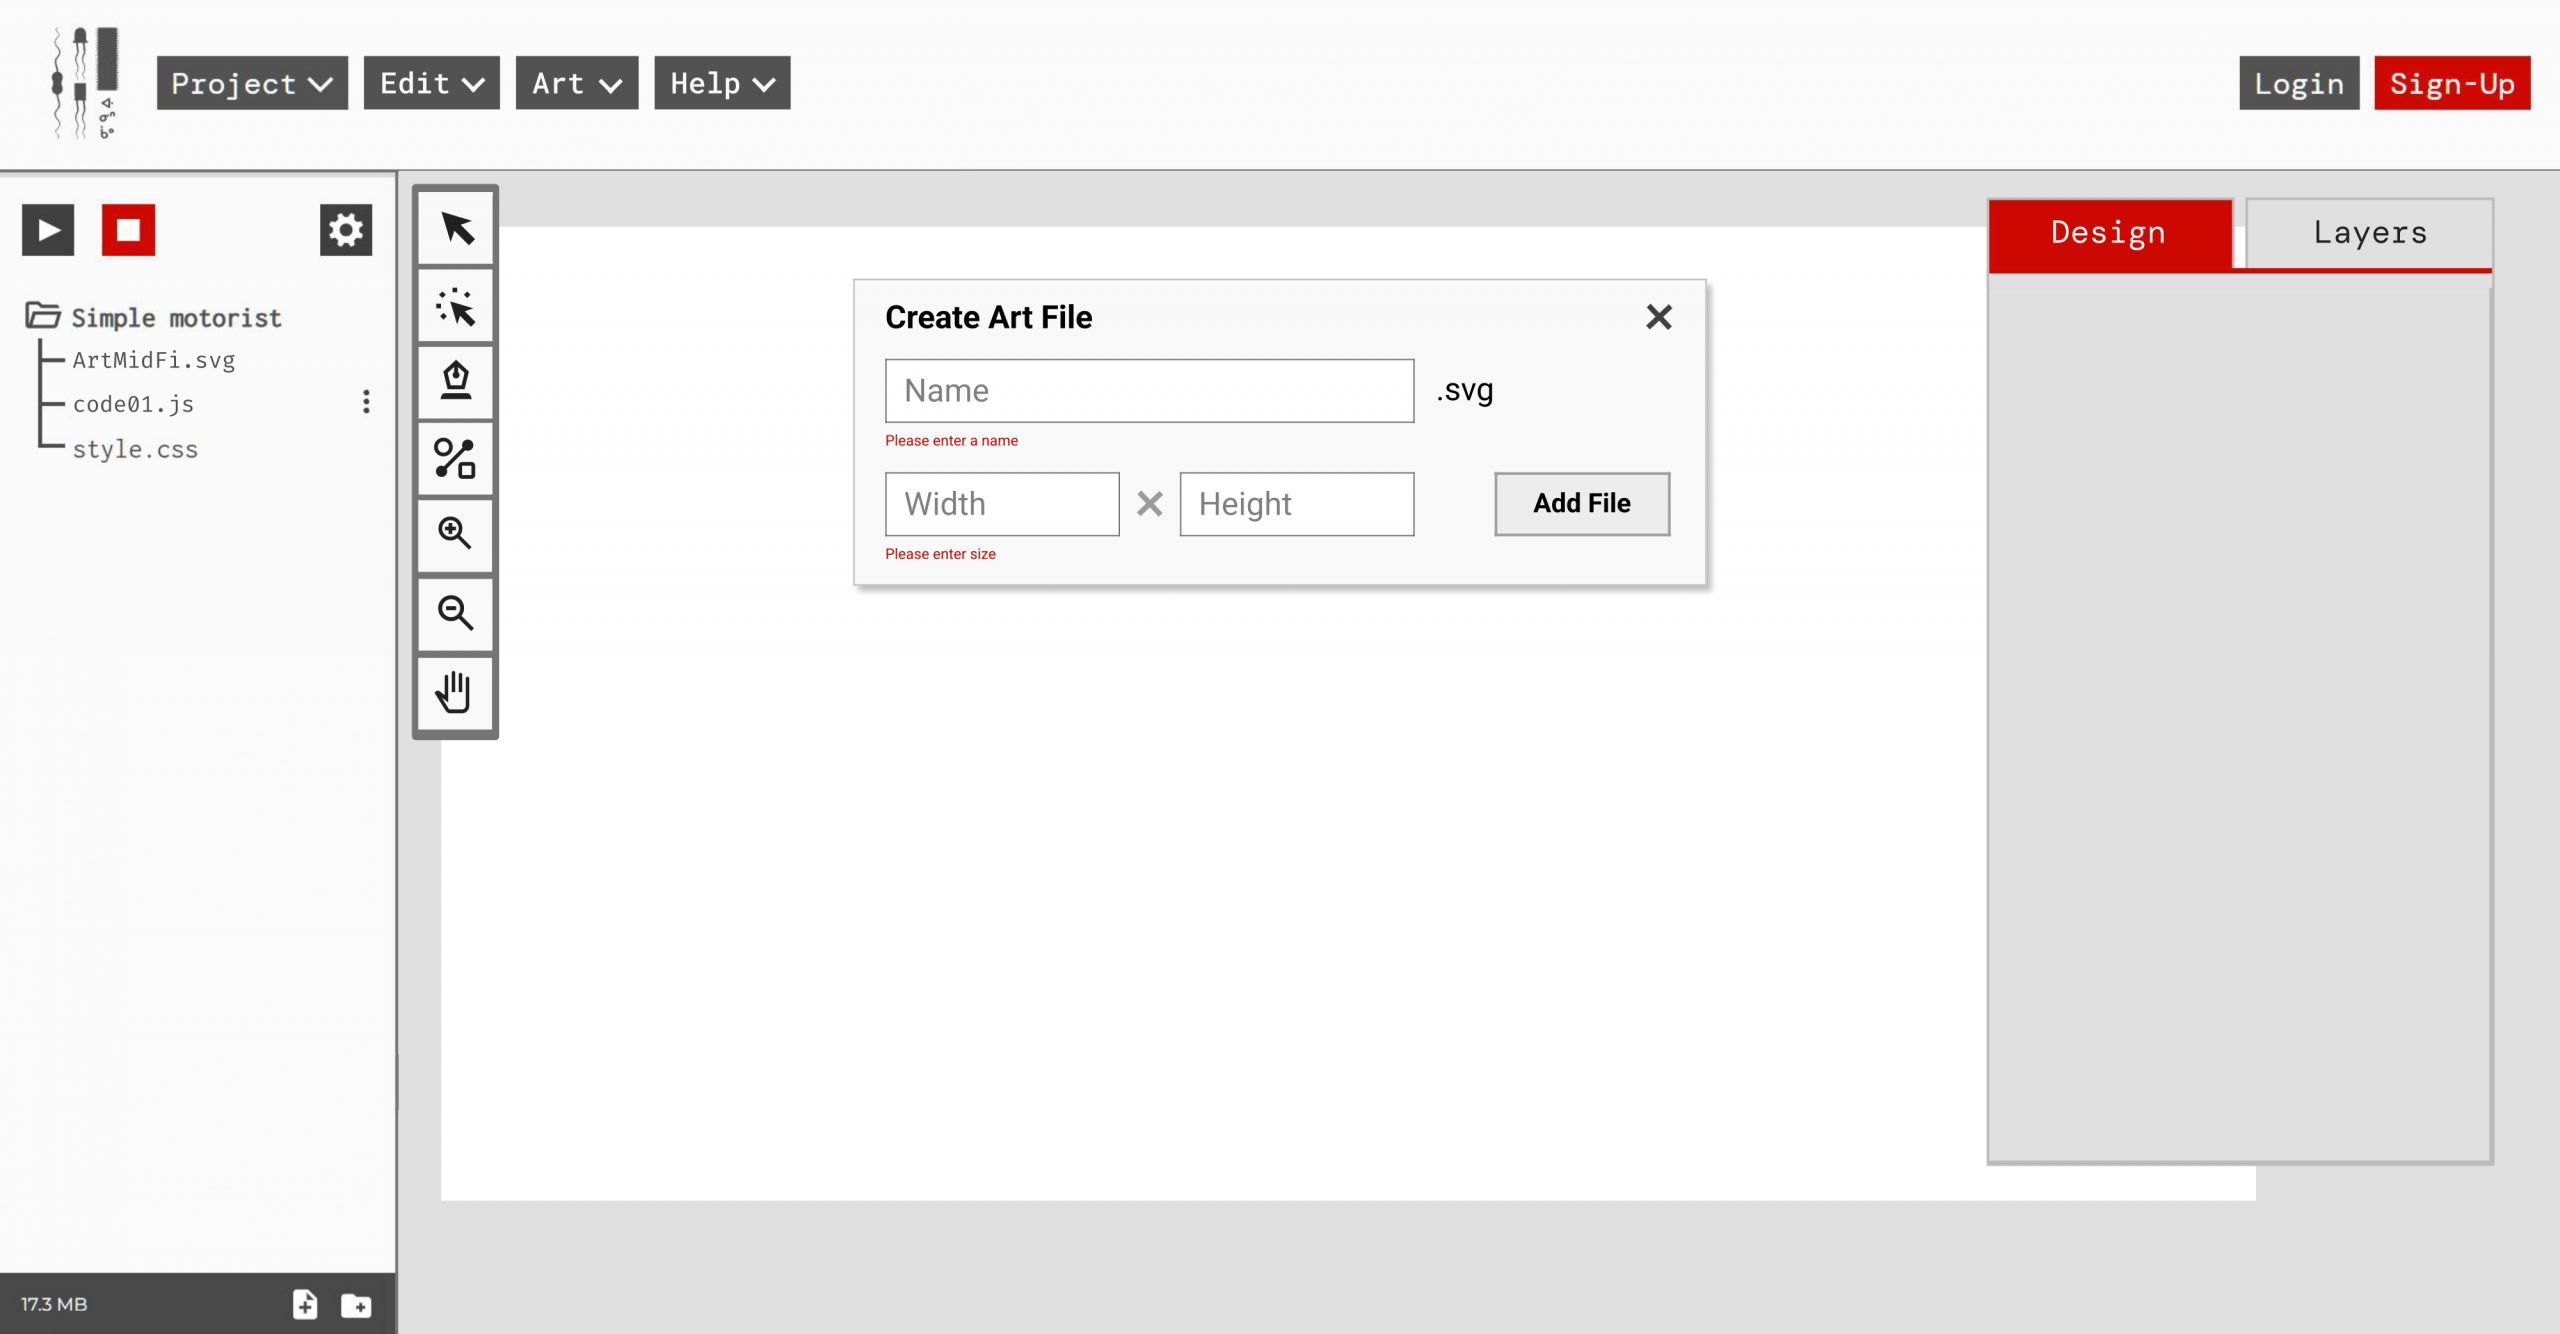
Video Trailer of The Waniskâw’s Art Tool
To play around with the prototype of the art tool – here’s the link. Click the Project button > Add Art File > Name your art file and set canvas size, then start drawing!